Building a k3s cluster with Raspberry Pi 4s
I’ve been interested in learning Kubernetes for a while now. However, my biggest issue has been getting a reliable and realistic cluster built. I’ve had too many issues with k3d.io, Minikube, and Microk8s. Plus, running a virtualized k8s cluster doesn’t give me the benefits of actually having a cluster up 24/7.
I decided to build my cluster using k3s and a few Raspberry Pi 4s.
Materials
I decided on using the 4 Gb Pi 4s, rather than the 8 Gb, the reason being, I already had a few spare, and I didn’t want to spend too much.
The full list is as follows (with Amazon.com links for convenience):
- 4x Raspberry Pi 4 (4gb)
- 4x UCTRONICS Pi 4 PoE HAT
- 4x 64gb MicroSD cards
- 1x 6-pack of 1ft Cat 6 Cables
- 1x 4-port PoE switch (1gbps)
- 1x Raspberry Pi 4 Cluster case
Note: The PoE hat I linked above comes with a fan that is a bit loud. If you want a fanless version, this hat would be my second choice. Again you’ll need 4 of them.
Setting up
This guide assumes you have a Linux or Mac Machine. Windows will be slightly different with the CLI tooling and commands.
The first step is to image your MicroSD cards. I like to use the Raspberry Pi Imager for simplicity.
In terms of the OS you use, I’d recommend using 64-bit, along with a headless distro to save your precious compute power for the important work, running your k3s cluster.
I picked the Ubuntu Server 20.044.2 LTS (64-bit) image.
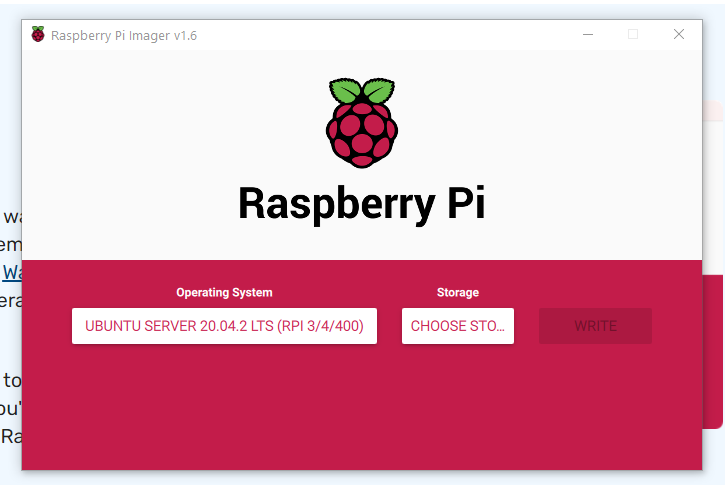
So go ahead and flash all your microSD cards.
Enabling cgroup memory
Before you boot up your Pis. You’ll need to edit the /boot/cmdline.txt file on your computer.
You need to add cgroup_memory=1 cgroup_enable=memory swapaccount=1 to the end of the file.
For reference, this is what my file contained:
net.ifnames=0 dwc_otg.lpm_enable=0 console=serial0,115200 console=tty1 root=LABEL=writable rootfstype=ext4 elevator=deadline rootwait fixrtc cgroup_memory=1 cgroup_enable=memory swapaccount=1
Do this for all 4 Pis, otherwise, k3s will fail to start.
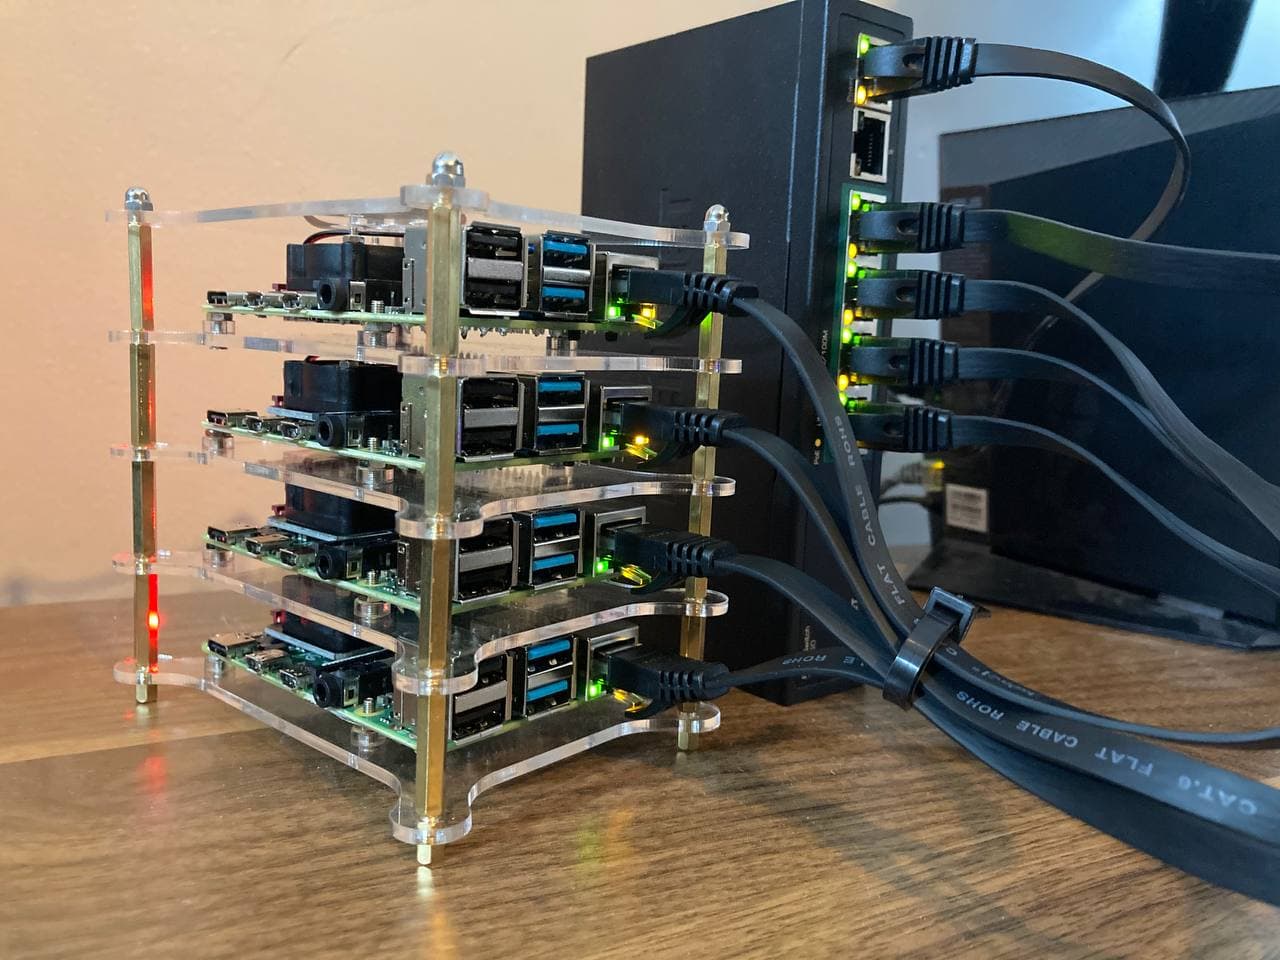
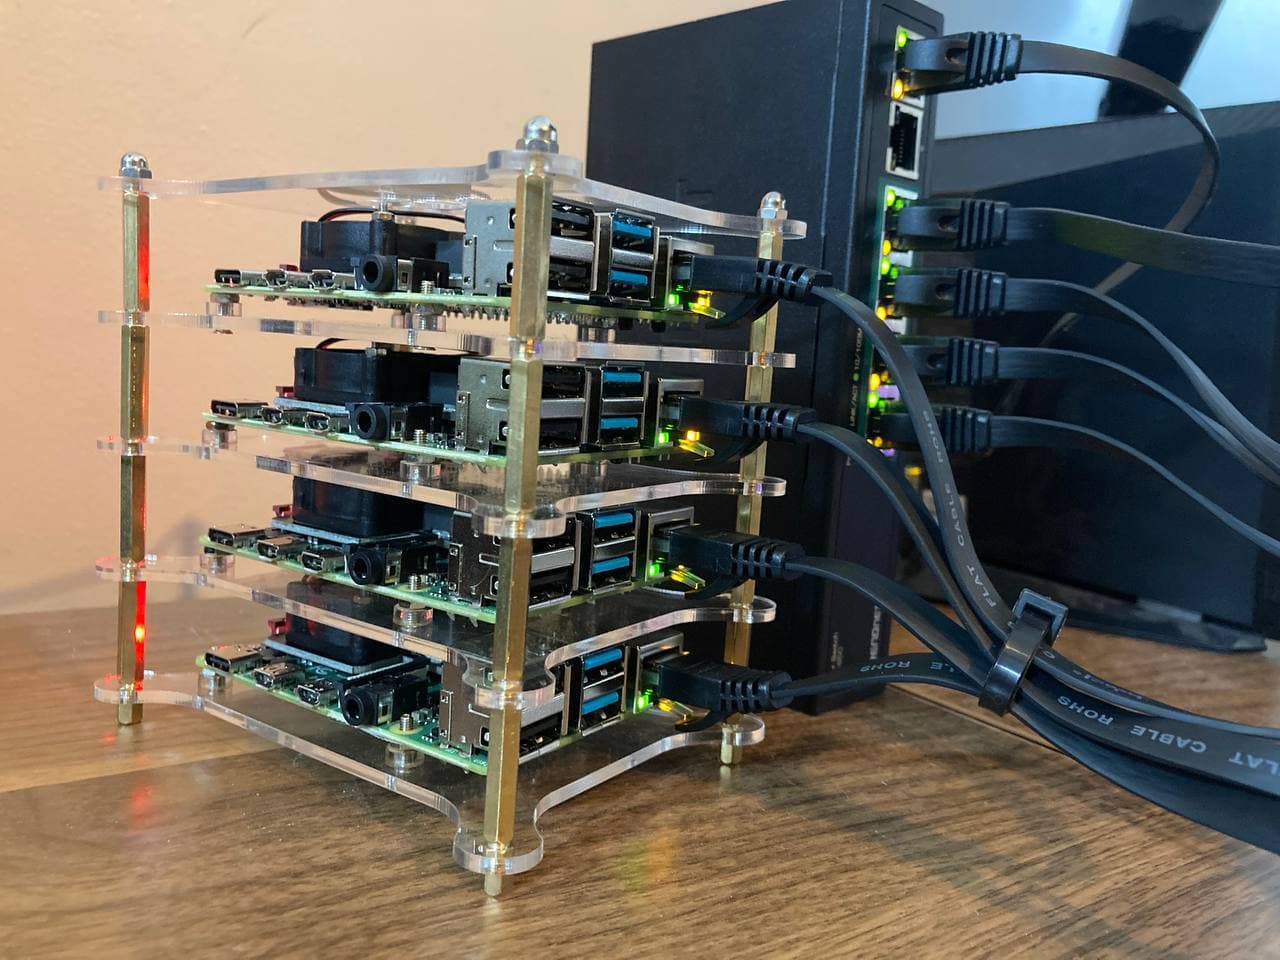
Installing the PoE hats.
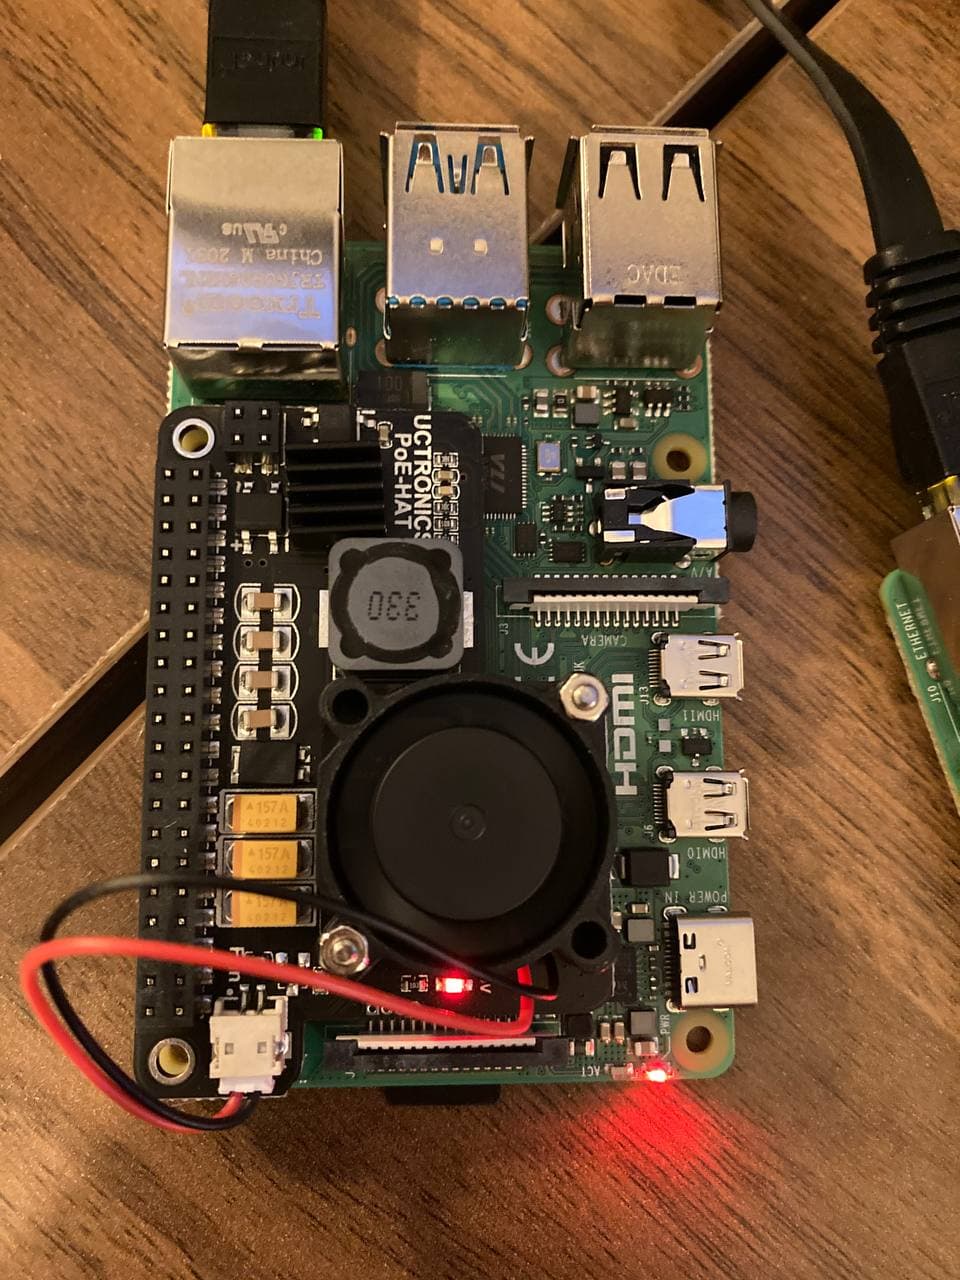
The Pi 4 with the PoE hat installed.
The PoE hats come with standoffs you can install, but if you bought the cluster case as I did, you can skip that step.
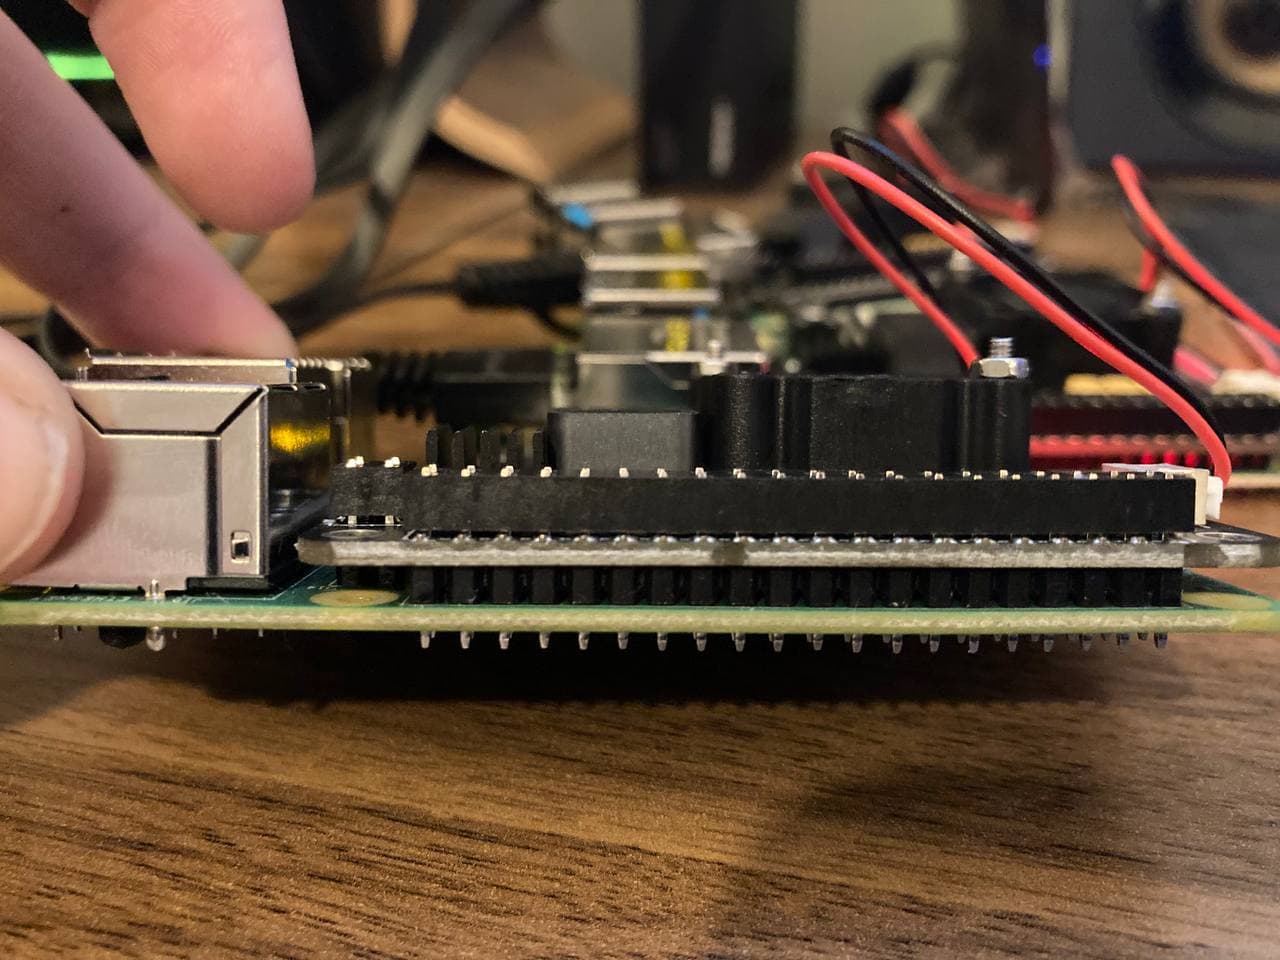
The PoE hat flush against the pins.
In terms of putting the hats on the Pis, they need to be nice and flush on the GPiO pins. It takes a bit of force to get them on, so make sure you’re applying it evenly across the pins. See the image above for reference.
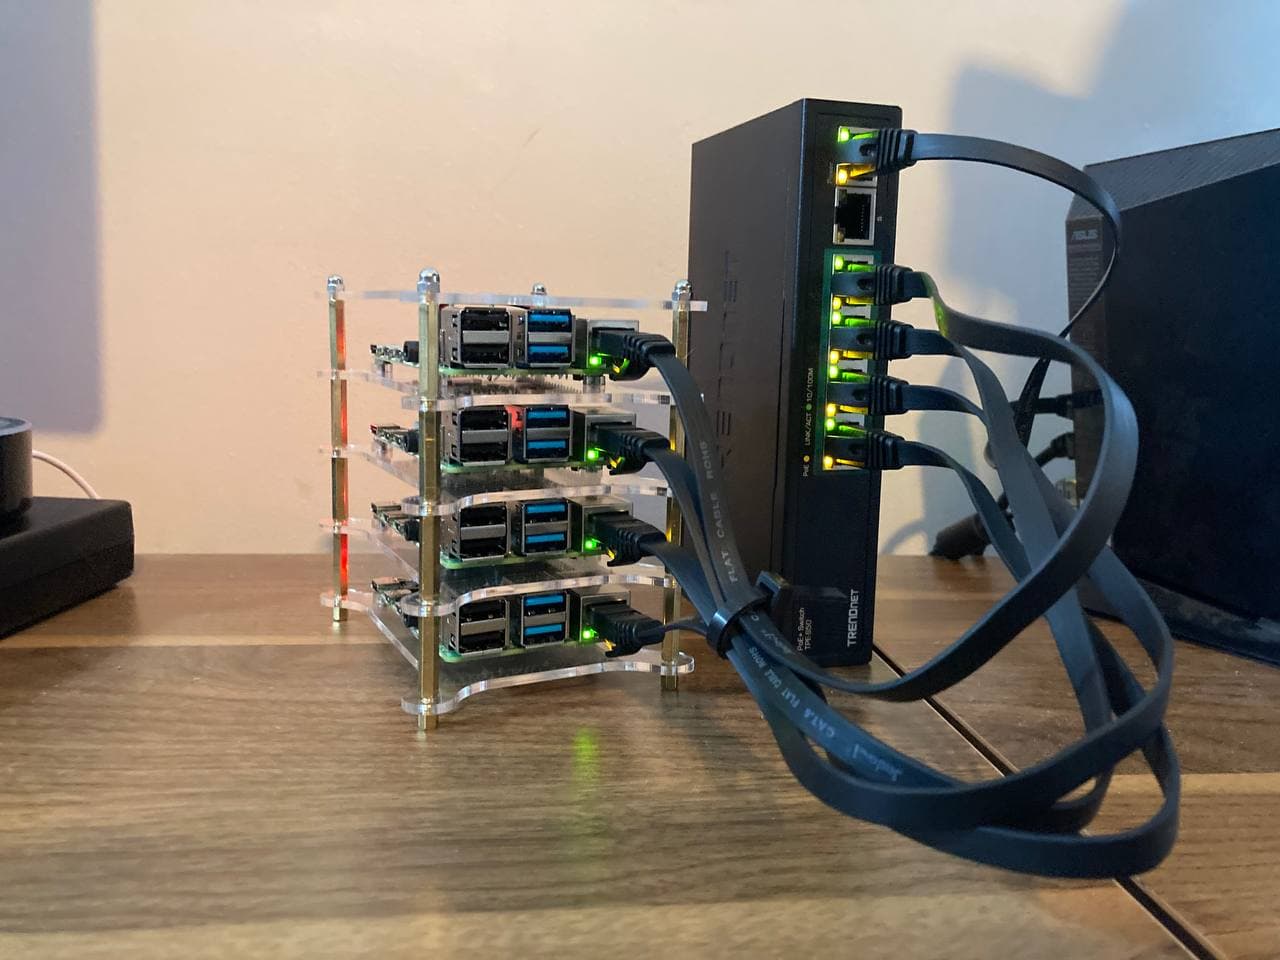
Powering it up.
Now you just need to plug-in your PoE switch and plug-in each Pi.
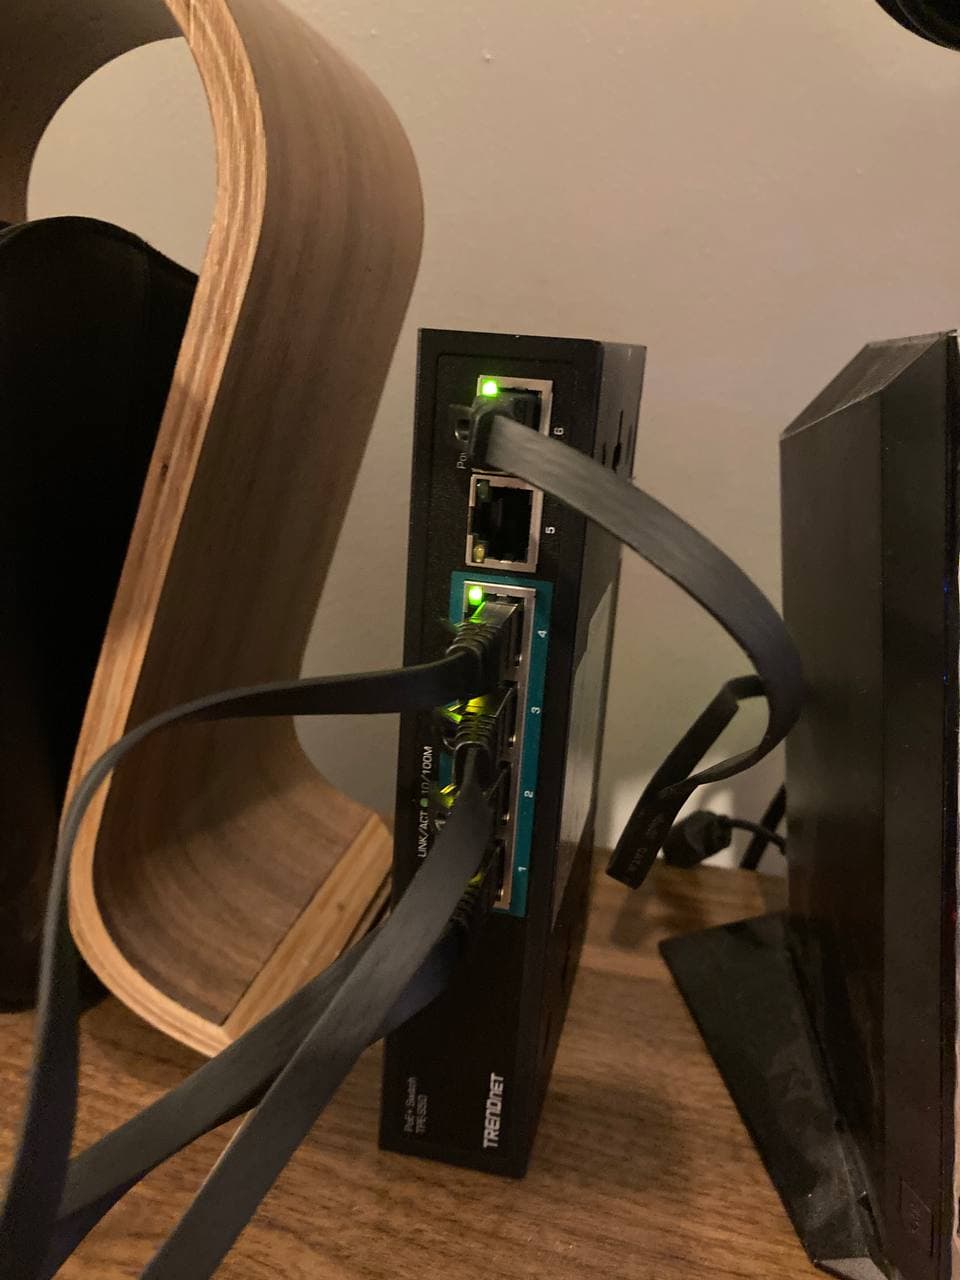
And voilà, your cluster is almost ready to go.
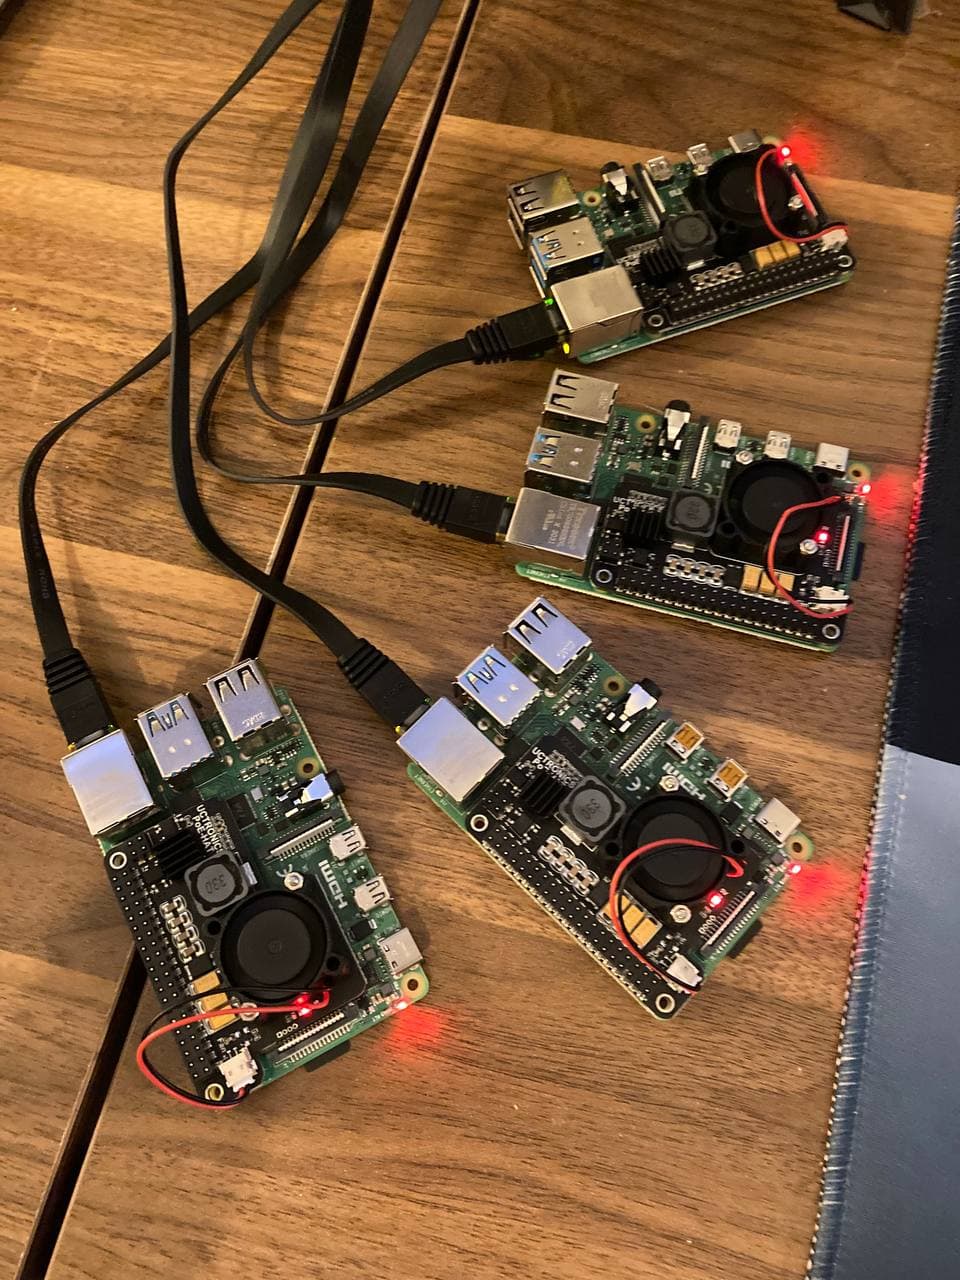
We just need to do a bit more work and you’ll be deploying pods in no time.
Installing K3S
Give your Pis a few minutes to boot up and get ip’s from your DHCP server.
Once they’re up and running, take a look in your router’s DHCP leases for entries under ubuntu (not this may be something like raspberrypi if you used a different OS image.)
Note: I had already changed my hostnames

Once you have the IPs, you can ssh in (default credentials for the Ubuntu Server image are ubuntu and ubuntu for username and password.)
Initial Configuration (ssh-copy-id and changing passwords, and hostnames)
For each pi, run the following commands (note: your IPs will be different)
ssh ubuntu@<ip>
After you SSH in for the first time, enter the default password: ubuntu. It will then ask for the password again, and then have you create a new password.
Once you have set a new password, run:
ssh-copy-id ubuntu@<ip>
and enter your new password.
If you’d like to set a specific hostname for each pi, I’d do this now:
sudo echo pumpkin > /etc/hostname
I named each of my Pis after real Pies. :)
Installing & Using k3sup
The easiest way to set up k3s is to use k3sup
Install it via:
curl -sLS https://get.k3sup.dev | sh
sudo install k3sup /usr/local/bin/
I wrote a script to easily install k3s across all four pis:
#!/bin/bash

MASTER_NODE=$1
NODE1=$2
NODE2=$3
NODE3=$4

# Init MASTER_NODE
echo "Initializing $MASTER_NODE as master node."
k3sup install --ip $MASTER_NODE --user ubuntu

# Join nodes
for NODE_IP in $NODE1 $NODE2 $NODE3
do
  echo "Joining $NODE_IP to the cluster..."
  k3sup join --ip $NODE_IP --server-ip $MASTER_NODE --user ubuntu
done
It simplifies things a bit:
./init_pis.sh <master-ip> <node-ip> <node-ip> <node-ip>
I ran:
./init_pis.sh 192.168.0.77 192.168.0.70 192.168.0.71 192.168.0.54
Let that run, then export your KUBECONFIG and list the nodes:
export KUBECONFIG=`pwd`/kubeconfig
kubectl get nodes -o wide
That should output something like this:
NAME        STATUS   ROLES    AGE   VERSION        INTERNAL-IP    EXTERNAL-IP   OS-IMAGE             KERNEL-VERSION     CONTAINER-RUNTIME
pumpkin     Ready    master   17h   v1.19.8+k3s1   192.168.0.77   <none>        Ubuntu 20.04.2 LTS   5.4.0-1030-raspi   containerd://1.4.3-k3s3
cherry      Ready    <none>   16h   v1.19.8+k3s1   192.168.0.70   <none>        Ubuntu 20.04.2 LTS   5.4.0-1030-raspi   containerd://1.4.3-k3s3
apple       Ready    <none>   16h   v1.19.8+k3s1   192.168.0.71   <none>        Ubuntu 20.04.2 LTS   5.4.0-1030-raspi   containerd://1.4.3-k3s3
blueberry   Ready    <none>   16h   v1.19.8+k3s1   192.168.0.54   <none>        Ubuntu 20.04.2 LTS   5.4.0-1030-raspi   containerd://1.4.3-k3s3
Optional: Deploying Linkerd and a test app
Once your cluster is set up, we can deploy some pods or maybe a service mesh.
My preferred mesh is Linkerd. It’s very easy to install and a blast to use.
Installing Linkerd
Linkerd has a great getting started guide. But I’ll break it down here as well.
First off, let’s install the linkerd CLI.
curl -sL run.linkerd.io/install | sh
Next, let’s run our pre-install checks:
linkerd check --pre
Now let’s install the control-plane:
linkerd install | kubectl apply -f -
Let’s verify the installation worked:
linkerd check
If you’d like to install the visualization suite (which I recommend):
linkerd viz install | kubectl apply -f -f
Finally, you can open the linkerd dashboard like so:
linkerd viz dashboard &
This will open up the Linkerd Dashboard:

Deploying a demo app
Linkerd comes with a demo application you can easily install:
curl -sL https://run.linkerd.io/emojivoto.yml | linkerd inject - | kubectl apply -f -
This will create a new emojivoto namespace.
If you’d like to view the app:
kubectl -n emojivoto port-forward svc/web-svc 8080:80
Then browse to localhost:8080.

The emojivoto app comes with a load generator already. So if you look back at your dashboard, you’ll see the routes come in in real-time. Linkerd has great documentation on how to use their service mesh. I’d highly recommend checking them out!
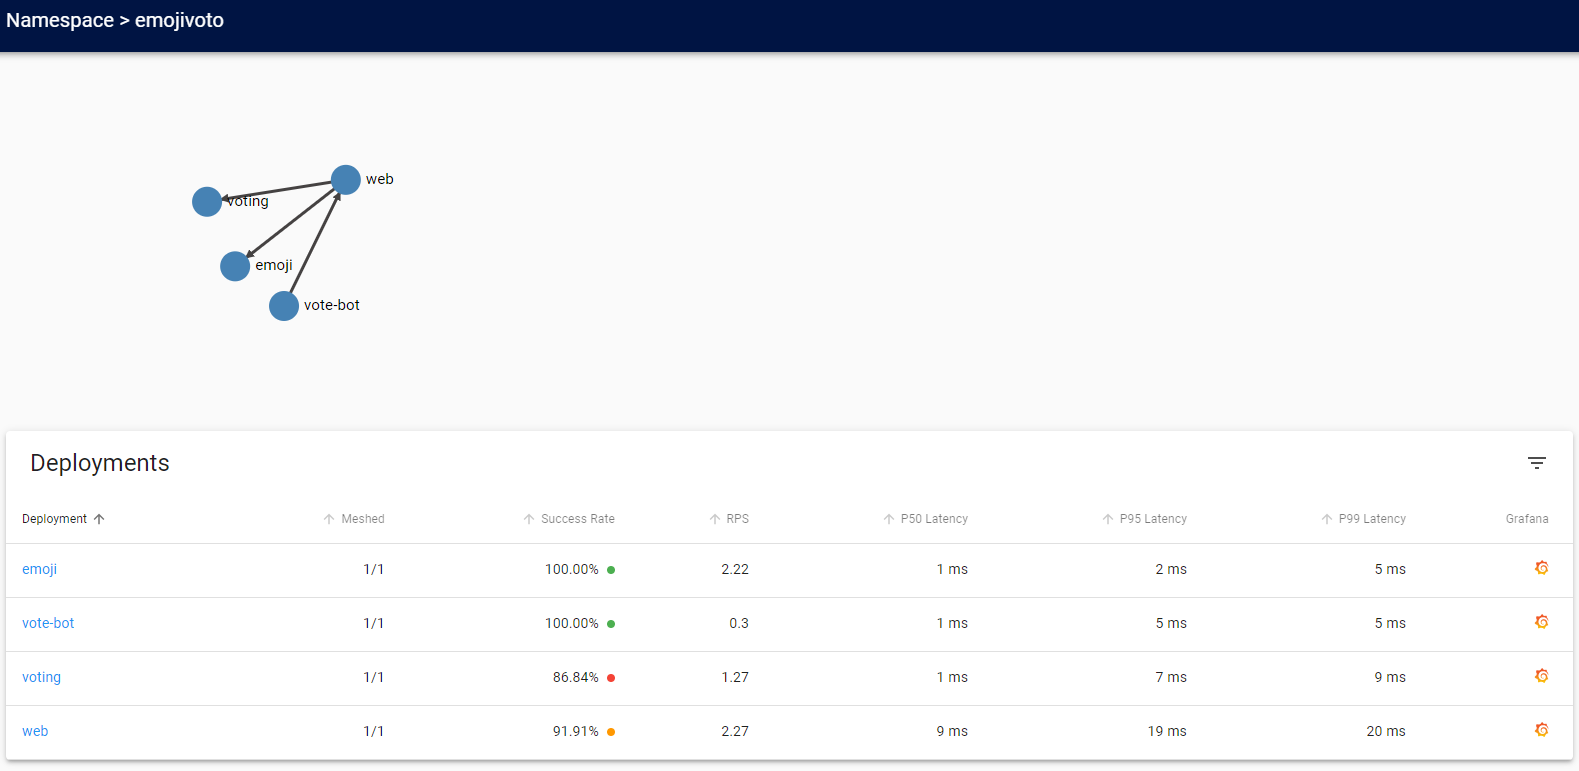
One of my favorite features is the network topology graph that shows how all your services are interconnected:
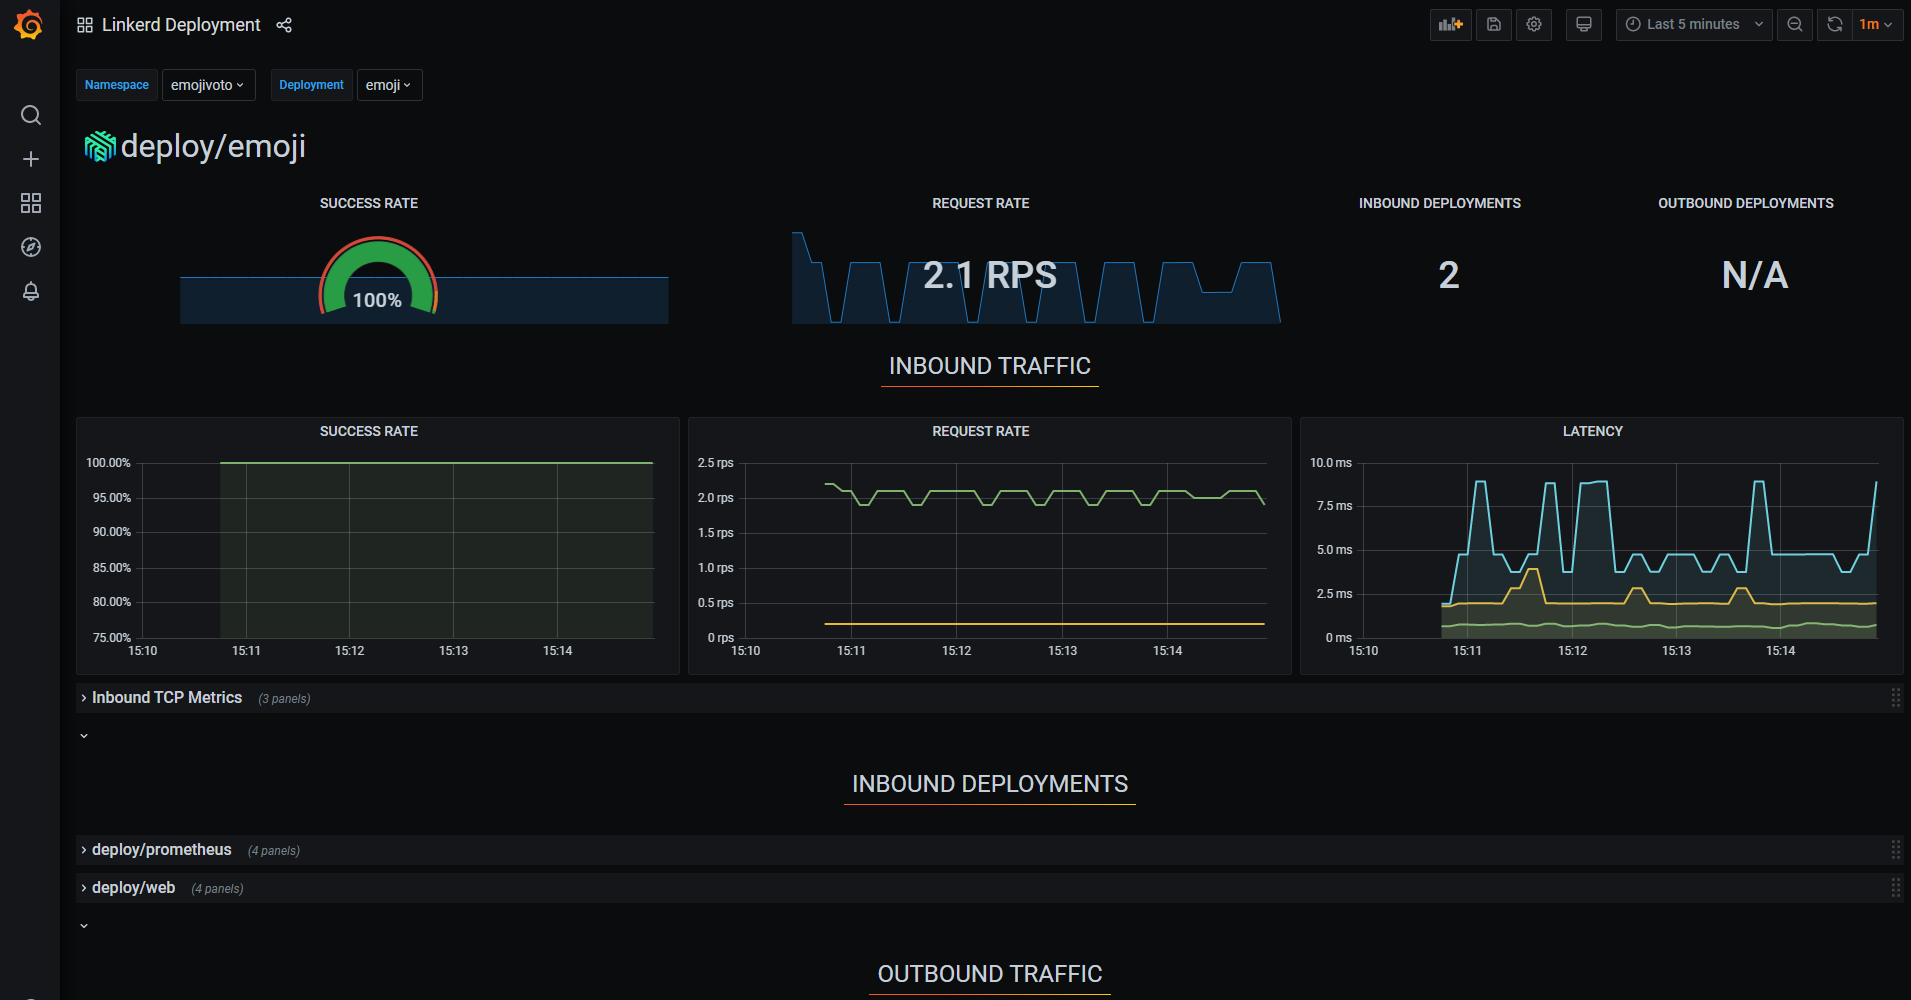
Also, Linkerd comes with build-in Grafana dashboard for monitoring your individual deployments and namespaces:
Wrapping up
That covers almost everything.
You should now have a fully-fledged k3s-cluster ready to go.
I’ll continue this series soon, I plan on showing how to use Flux’s operator to set up GitOps along with using Rust + Docker to automatically do multi-platform builds so you can deploy pods on any architecture, mixed or otherwise.